
AmmarAI / AI Fashion Studio
Your clothes, on models, without booking anyone
Upload the flat shot of the garment you already have. Get it worn — correct fit, real fabric drape, the model and setting you choose — for product pages, lookbooks and ads.
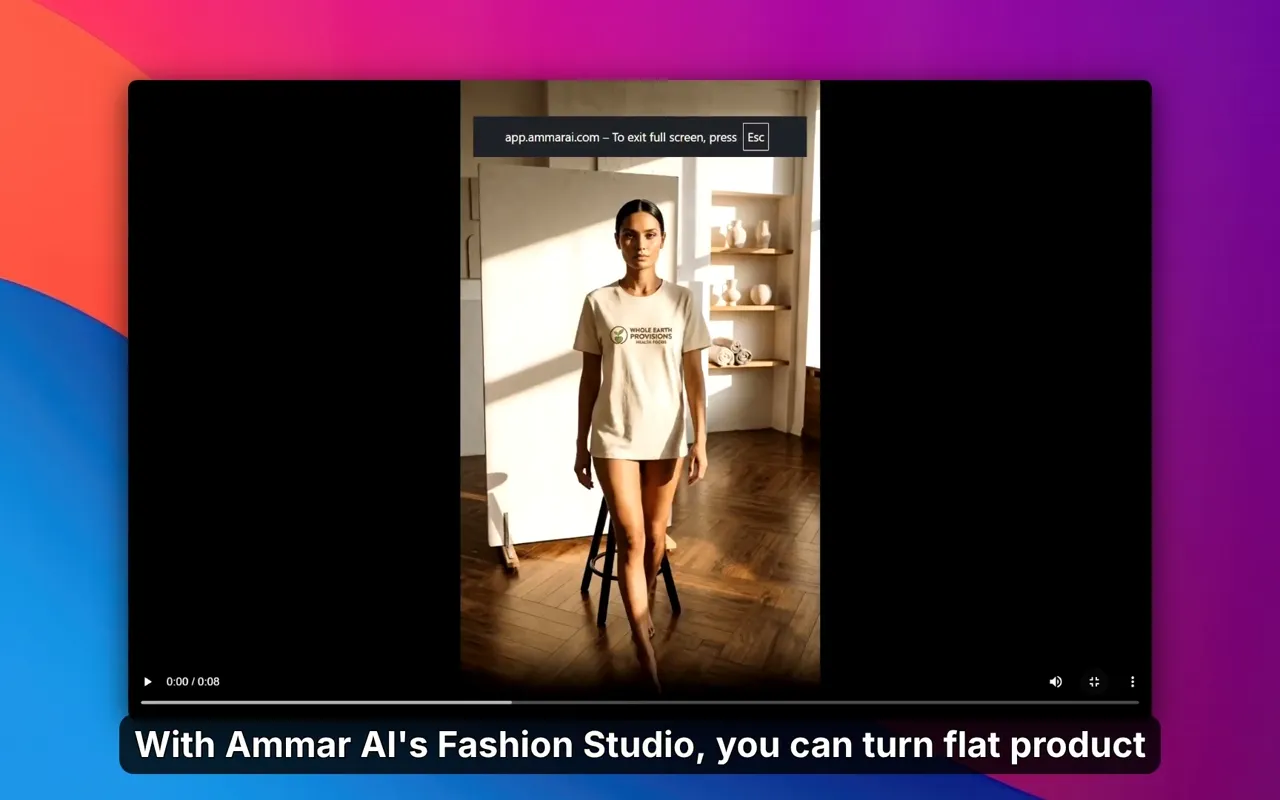
Screen recording
Watch a full Fashion Studio session
A real walkthrough inside AmmarAI, from choosing the garment to the finished images.
Six tools, one studio
Everything you need for a collection
Pick a tool to see its real screen inside AmmarAI.
AI Photoshoot
Choose a product, a model, a pose and a background, then review the full scene before generating.
Full step-by-step guide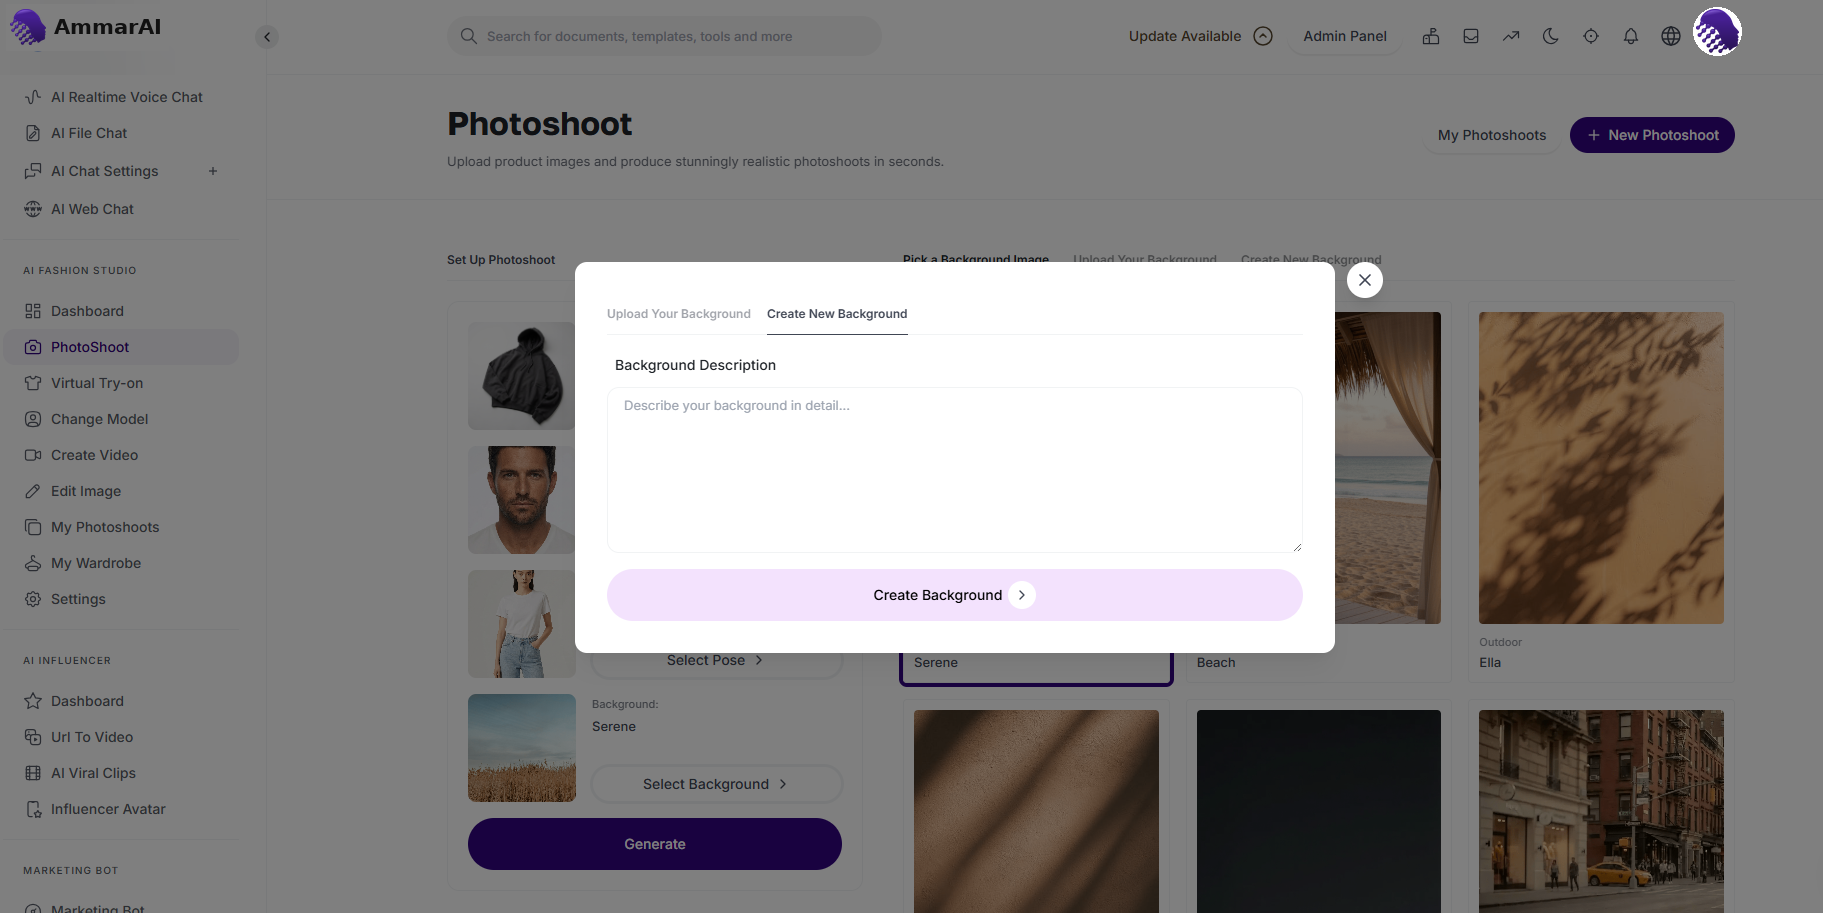
Prompt builder
Write a direction the model can follow
Pick one option per row and copy the direction into Fashion Studio with your garment photo.
garment
setting
pose
Your direction
A linen blazer worn by the model, relaxed standing pose, neutral studio wall, soft natural light. Keep the fabric, colour, print and seams exactly as in the uploaded photo.
What it does
Your garment, worn, in any setting
Accurate fit and drape
Fabric behaves by type — linen creases, knit clings, denim holds structure — instead of looking painted on.
Print and detail fidelity
Graphics, stripes, seams and hardware are carried across from your photo, not reinvented.
Diverse models on demand
Show the same piece across body types, ages and skin tones so shoppers can picture themselves in it.
Reusable models
Save a model and reuse them across the whole collection for a coherent brand look.
Outfit layering
Combine several garments into one styled look to sell the full outfit, not the single item.
Every colourway
Photograph one sample and generate the entire colour range for the product grid.
Your numbers
What does a photoshoot cost you per piece?
Enter what your last shoot cost and how many pieces it covered. These are your figures, not ours.
Cost per piece
$75.00
Repeat that for every colourway and season. With Fashion Studio, each new image uses credits from your plan instead — compare allowances on the pricing page.
What it is
Apparel sells on being worn. A folded flat lay tells a shopper nothing about fit, length or drape, and every model shoot means casting, studio, styling and a wait — repeated for each colourway.
The try-on tool takes the garment photo you already have and renders it worn: sleeve length in the right place, fabric behaving like the fabric it is, print and seams intact, shadows sitting where a real garment would create them.
Because the model is generated, you can show the same piece on different body types, ages and skin tones — the range of customers you actually sell to, not the one model you could afford.
What you can do
- Render a flat-lay garment worn on a model
- Show one piece on multiple body types, heights and skin tones
- Keep prints, logos, seams and trims accurate
- Change setting: studio, street, interior, outdoor daylight
- Build full outfits by layering several garments
- Produce every colourway from one photographed sample
- Generate front, side and detail views for a product page
- Keep one model and one light across a whole collection
- Swap the model on an existing image in seconds
- Edit, crop and enhance generated images without leaving the tool
- Upload your own models and backgrounds instead of generated ones
- Turn a product into a short campaign-ready video
Step by step
How to put a garment on a model
- 01
Upload the garment
A flat lay or mannequin shot, evenly lit, whole item visible, prints and details in focus.
- 02
Pick the model and setting
Body type, height, hair, skin tone, pose and location — or reuse a saved model so the collection matches.
- 03
Generate and check the fit
Review sleeve and hem length, drape and print placement. Adjust in words and regenerate.
- 04
Publish the set
Export product-page views, lookbook shots, story crops and a short product video from the same session.
Who it's for
Built for people who sell clothes online
Fashion brands
New drops need on-model imagery faster than shoots can be booked.
Online clothing stores
Supplier flat lays convert badly; worn imagery answers the fit question shoppers actually have.
Print-on-demand sellers
Show designs on real-looking garments and people instead of the same generic mockup.
Marketplace sellers
Stand out in a grid where everyone is using the identical supplier photo.
Pre-launch imagery
Build the product page and the ads from a single sample before bulk stock arrives.
Inclusive size representation
Show the same garment across the sizes you sell, which reduces returns as much as it improves conversion.
Seasonal lookbooks
Restyle the existing range into a new season's setting without reshooting the collection.
Examples
Example inputs and outputs
All sample prompts
Browse every prompt and its matching output description.
01Flat lay to lookbook
Input
A folded olive linen blazer photographed on white. Direction: neutral studio wall, soft daylight, relaxed pose.
Output
The same blazer worn open on a model against a warm neutral wall — linen creasing correctly, lapels and buttons intact, plus a three-quarter and a detail crop.
02Flat T-shirt to model shot
Input
A cobalt blue T-shirt with thin white stripes and a small wave emblem, photographed flat. Direction: warm neutral studio, soft daylight, relaxed pose.
Output
The same striped T-shirt worn naturally on a model, with the collar, cotton texture, stripe spacing and chest emblem preserved in a polished lookbook shot.
Tips that improve results
- Photograph the garment flat and wrinkle-free — the model inherits whatever creases you upload.
- Say the fabric out loud in the prompt ("heavy linen", "ribbed knit") so the drape is right.
- Reuse one saved model across a collection; mixed models make a grid look chaotic.
- Check hem and sleeve length against the real garment before publishing.
Mistakes worth avoiding
- Uploading a garment on a hanger with the shape distorted and expecting an accurate fit.
- Generating a fit that flatters more than the real item does — that is a returns problem.
- Ignoring size representation and showing only one body type.
- Skipping a flat product shot; shoppers still want to see the item itself.
AI Fashion Studio FAQ
Does the garment stay accurate?
Yes — colour, print, seams and trims come from your photo. The model, pose and setting are generated around it.
Can I use the same model across products?
Yes. Save a model and reuse them so the whole collection looks shot in one session.
Do I need to disclose AI imagery?
Rules vary by market and platform. Be accurate about the product, and follow the disclosure rules of the channels you sell on.
Does it work for accessories and shoes?
Yes, worn accessories, bags and footwear work the same way; for pure product scenes use the Product Photoshoot tool.
Tools to try next
Finish the rest of the launch
AI Product Photoshoot
Product-only scenes for shoes, bags and accessories.
AI Image Editor
Clean up and retouch the finished shots.
Image to Video
Turn a lookbook image into a short ad clip.
Product Copy
Write the product description to go with the photos.
Get started
Put your first garment on a model
Fashion Studio uses your plan's image and video credits. Check which plan fits on the pricing page.