
Chat & Documents
How to build and embed a website chatbot
An external chatbot is the assistant your visitors talk to on your own website. You give it a name and a voice, tell it what it is allowed to talk about, train it on your pages and documents, then paste a small snippet into your site.
This guide follows the whole creation flow: configure, customise, train, test and embed.
When to use this
- You answer the same questions from visitors over and over.
- You want help available on your site outside working hours.
- You want visitors to reach a human when the assistant cannot help.
Create the chatbot
Open AI Bots
Select AI Bots in the workspace menu. This is where every chatbot you build lives, together with the conversations visitors have had with them.
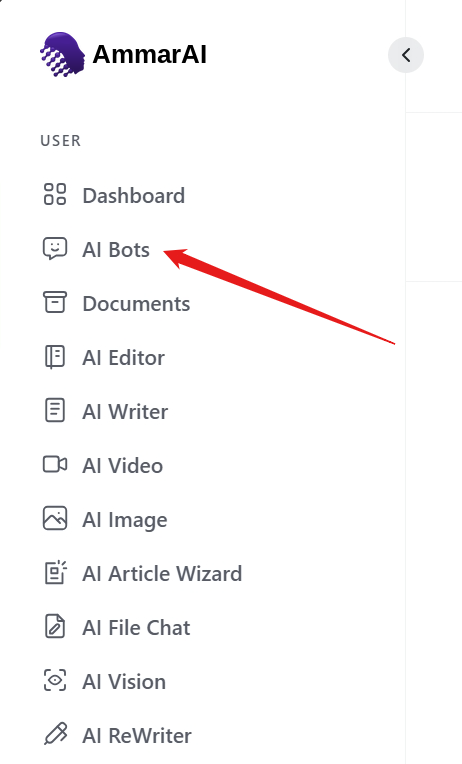
AI Bots holds every chatbot you build. Add a new chatbot
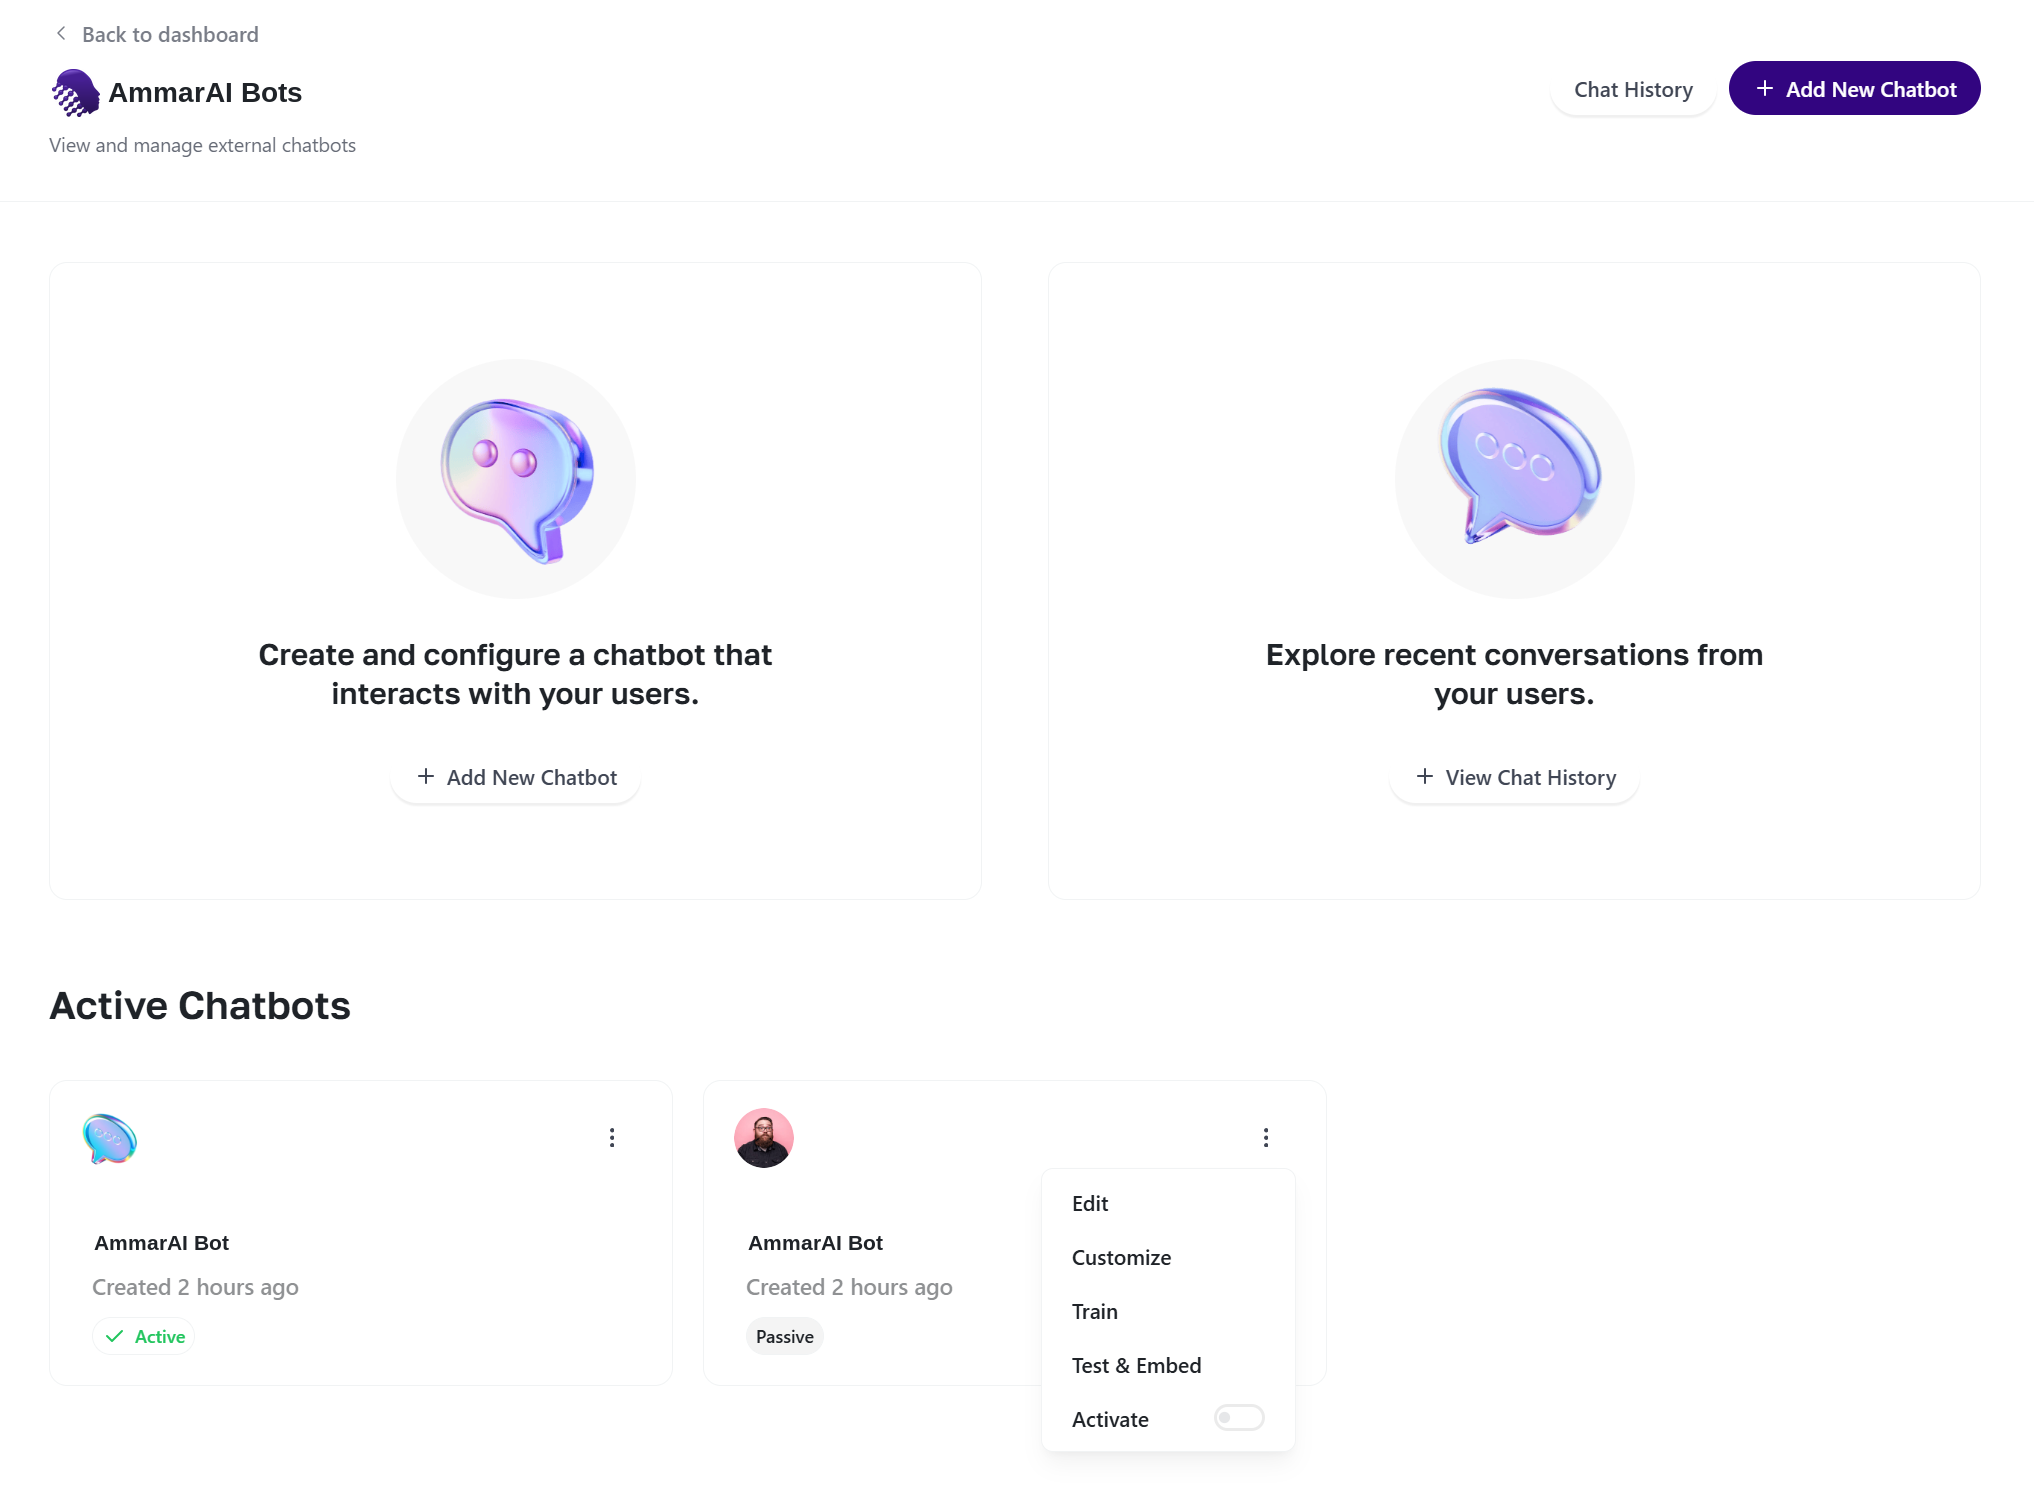
Choose Add New Chatbot to start. If you already have bots, the same page lists them under Active Chatbots so you can pick one up again instead of starting over.
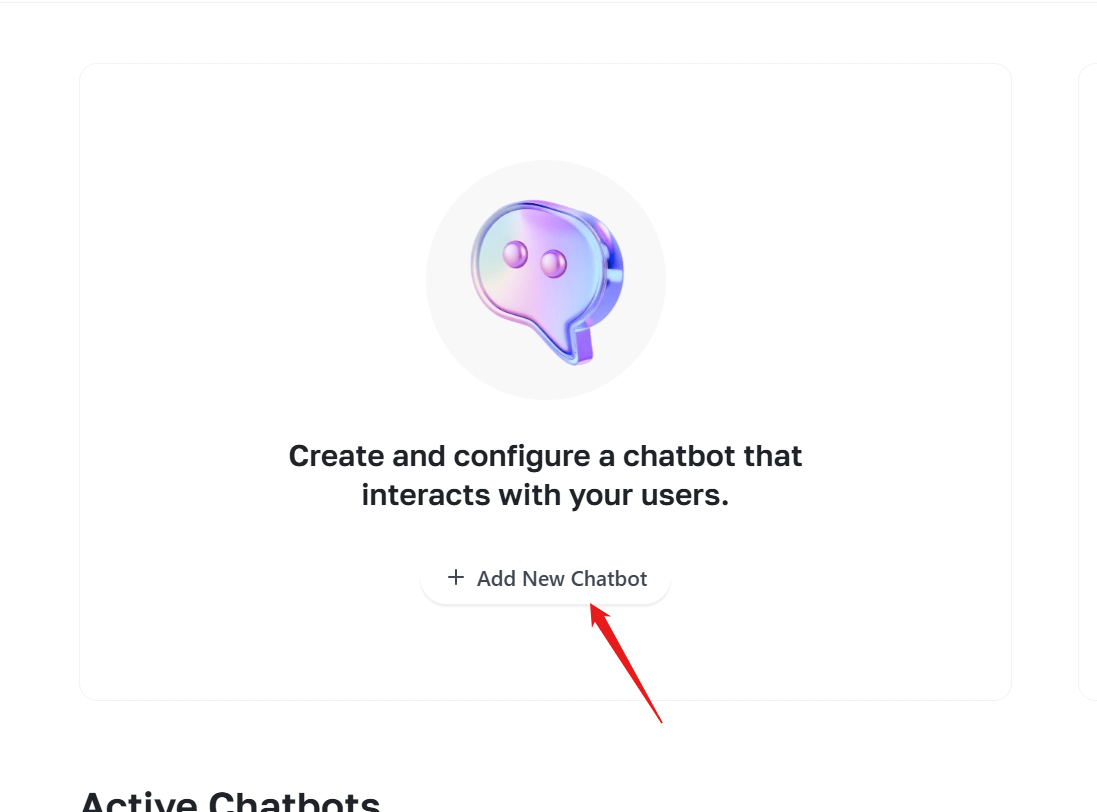
Start a new chatbot from the AI Bots page. Fill in the basics
Give the chatbot a title, the short bubble message that invites people to open it, and the welcome message it opens with. In Chatbot Instructions, describe its role, what it should help with and what it should refuse. Turn on Do Not Go Beyond Instructions when you want it to stay strictly inside that brief, pick the language and choose the model. The live preview on the right updates as you type.
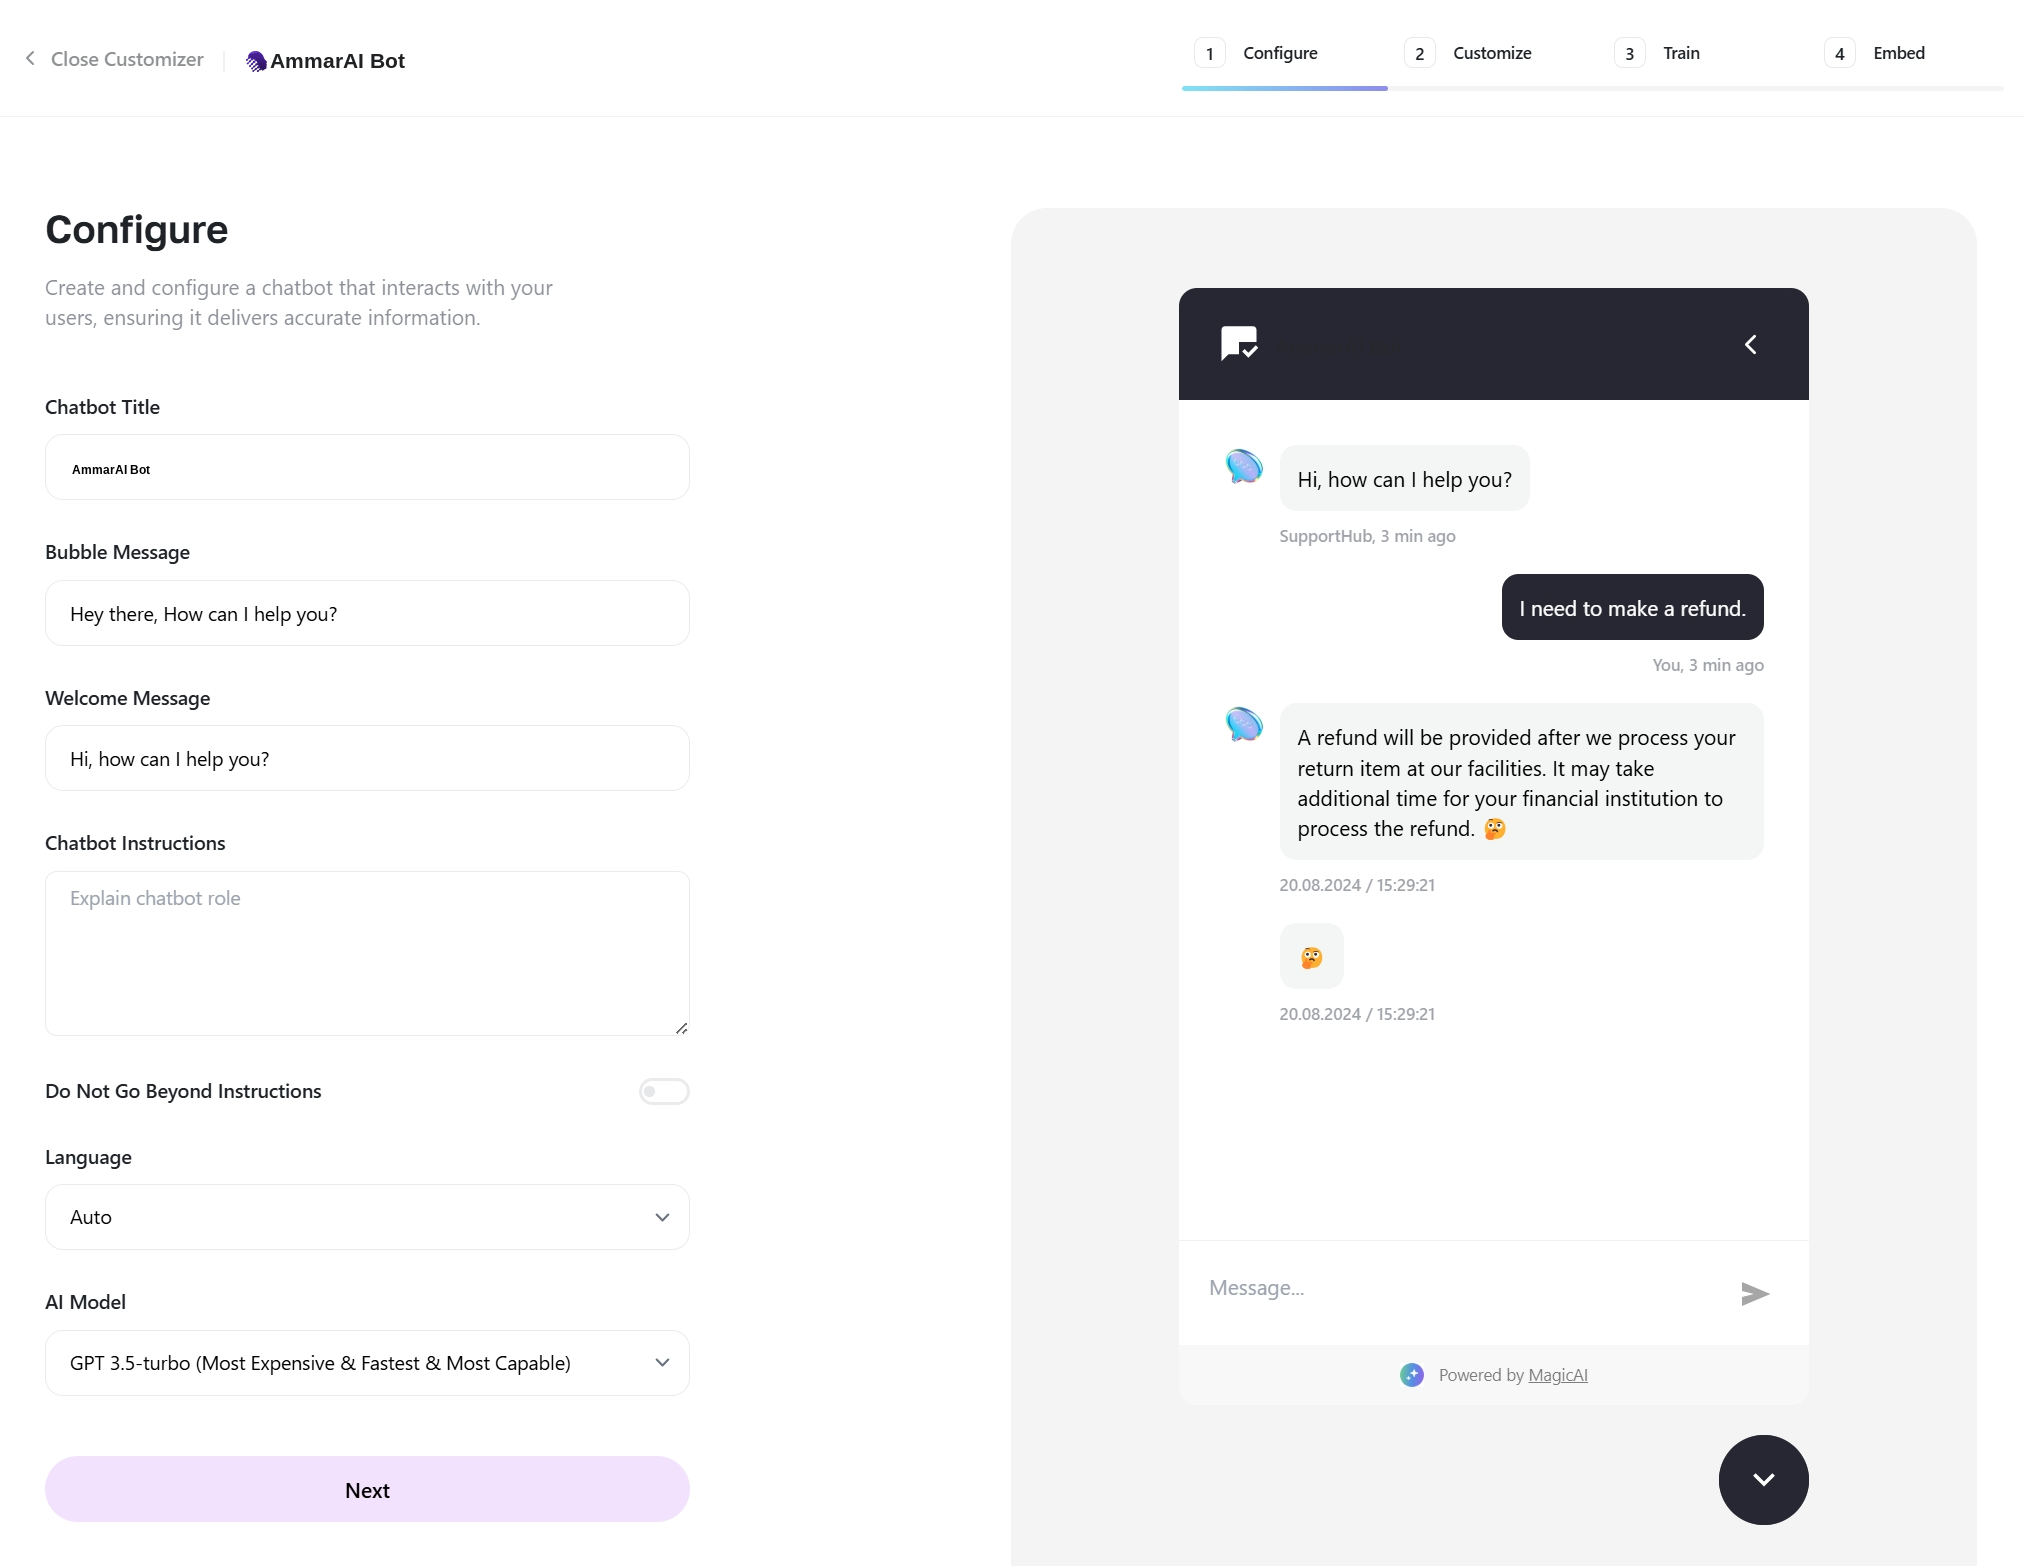
Everything you set here is visible in the preview straight away. Decide how conversations are handled
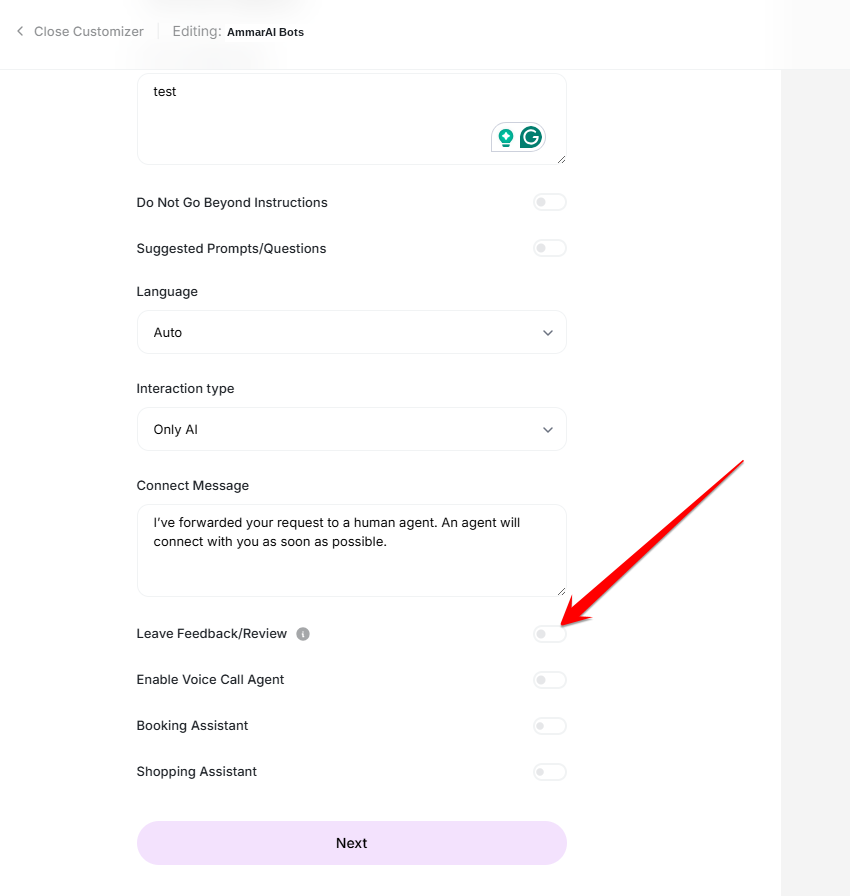
Set the interaction type to choose whether the assistant answers alone or can pass a conversation to a person, and write the connect message the visitor sees when that happens. The same panel has optional extras such as feedback collection, a voice call agent and booking or shopping help.
Decide what happens when the assistant cannot answer. Offer starter questions
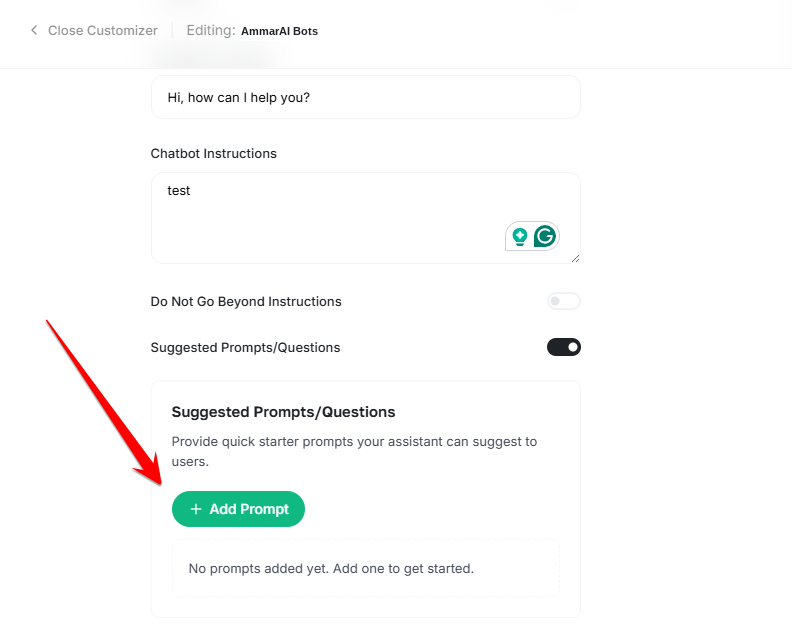
Turn on Suggested Prompts/Questions and add a few openers, such as your pricing, delivery or booking questions. Visitors who do not know what to ask will usually pick one of these, which keeps the conversation on ground the assistant knows well.
Starter prompts guide visitors into useful questions.
Style it for your site
Choose the look
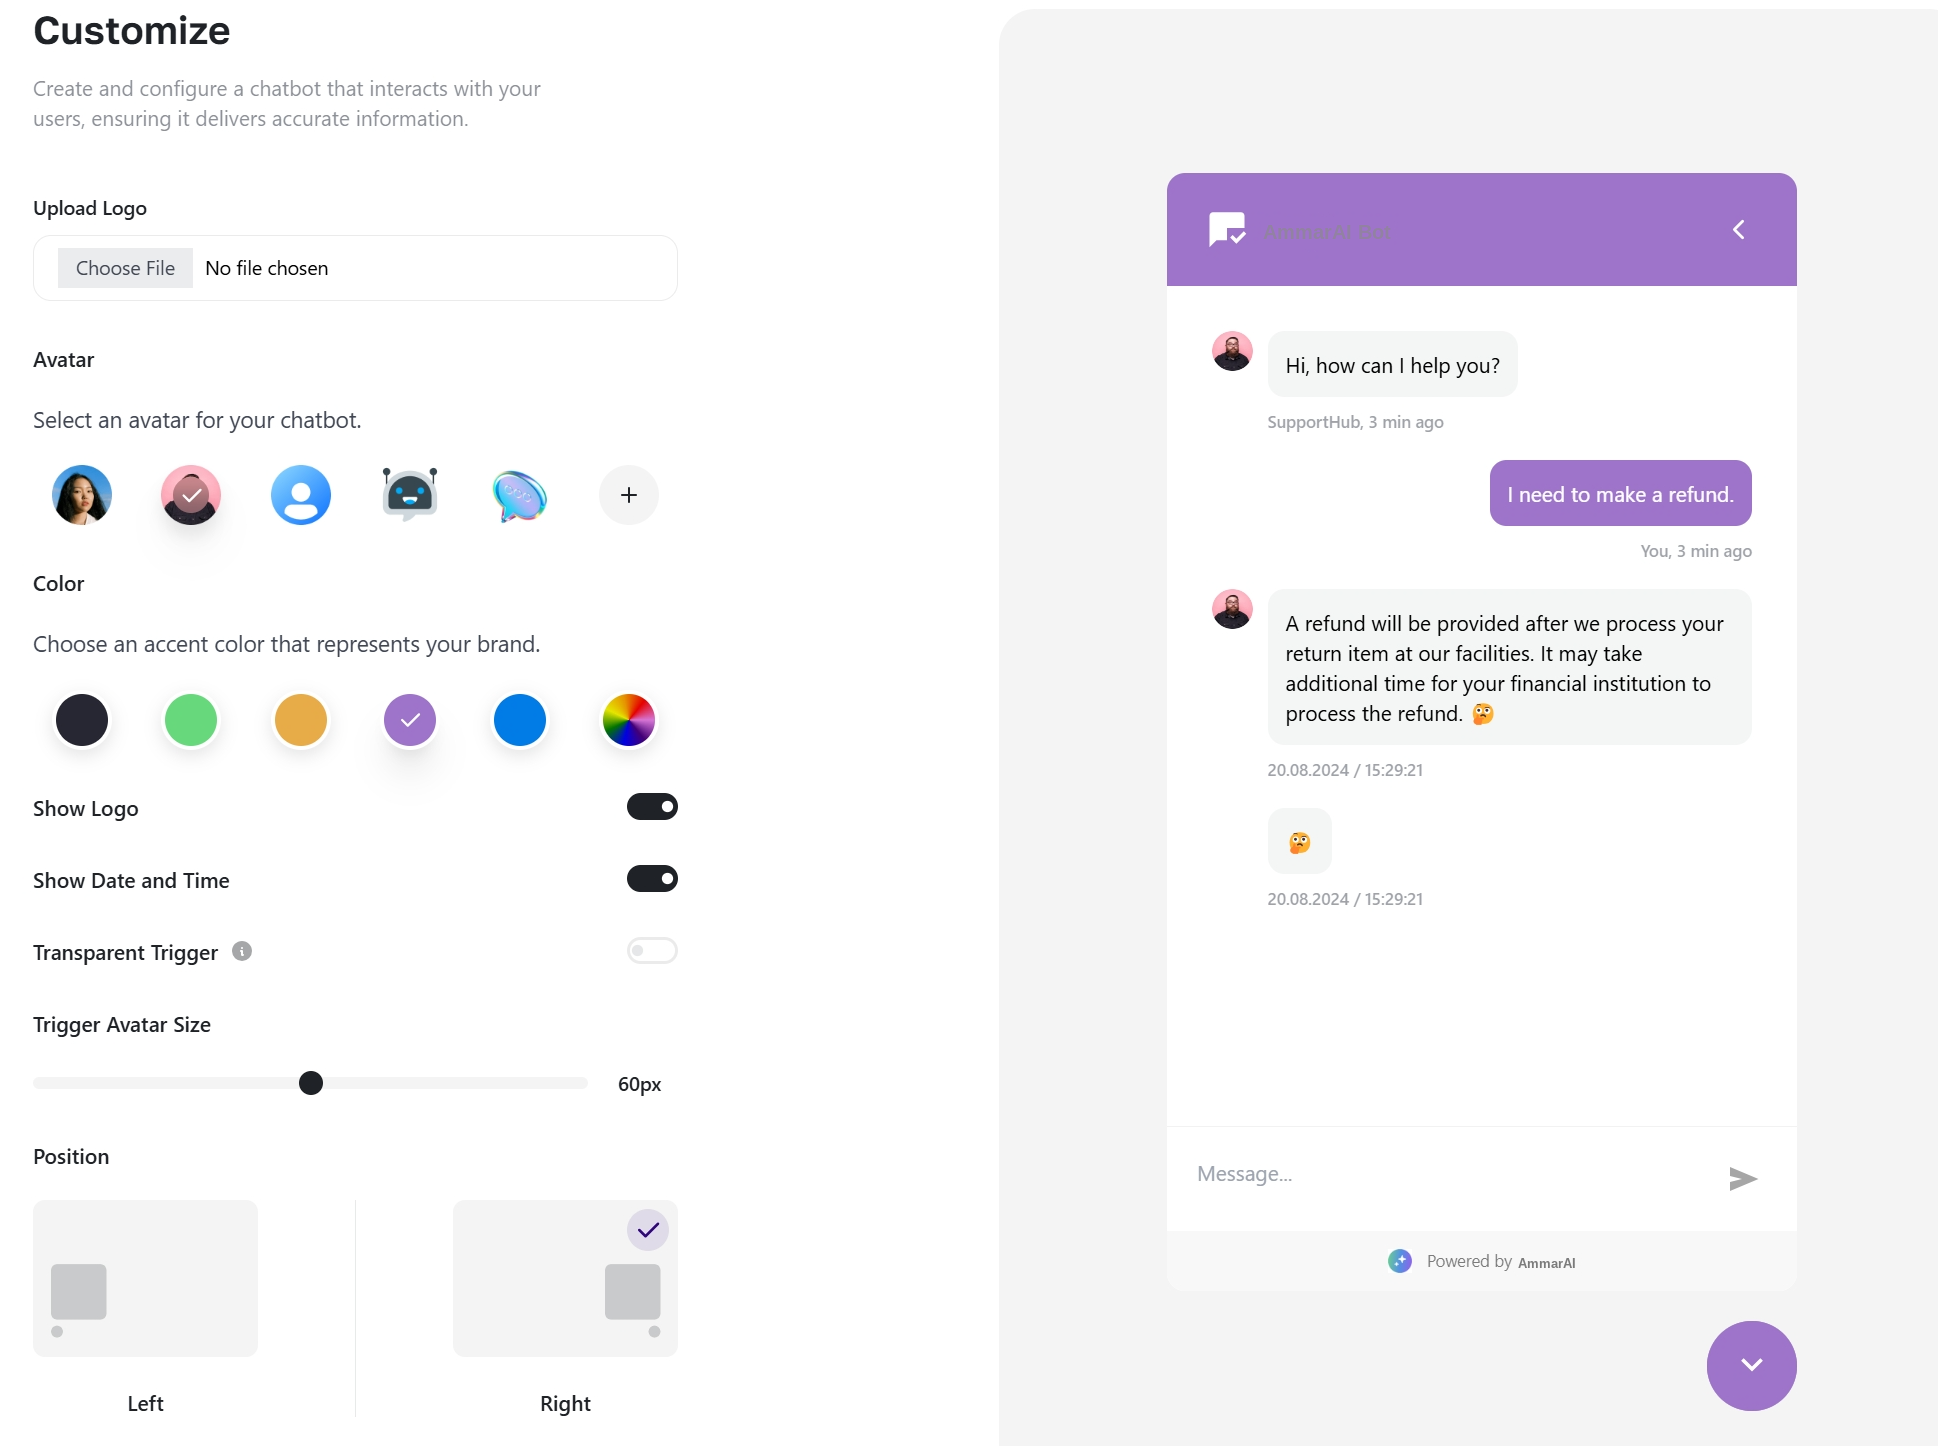
In the customise step, upload your logo, pick an avatar and an accent colour, then decide whether to show the logo and timestamps. You can set the size of the launcher and place it on the left or the right of the page.
Match the assistant to your site before anyone sees it. Pick the bubble design
The bubble design controls what the closed launcher looks like on your page — a plain bubble, a link bubble, a modern style, a suggestion bubble or a promo banner. Choose the one that suits how much attention you want it to draw.
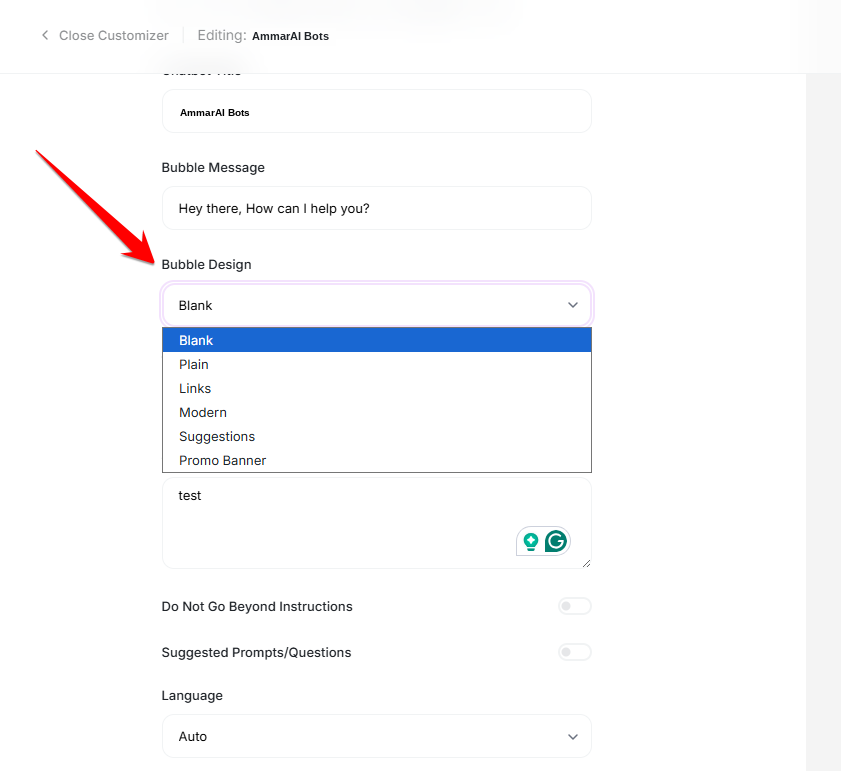
The bubble design is the first thing a visitor sees.
Train, test and publish
Train it on your own content
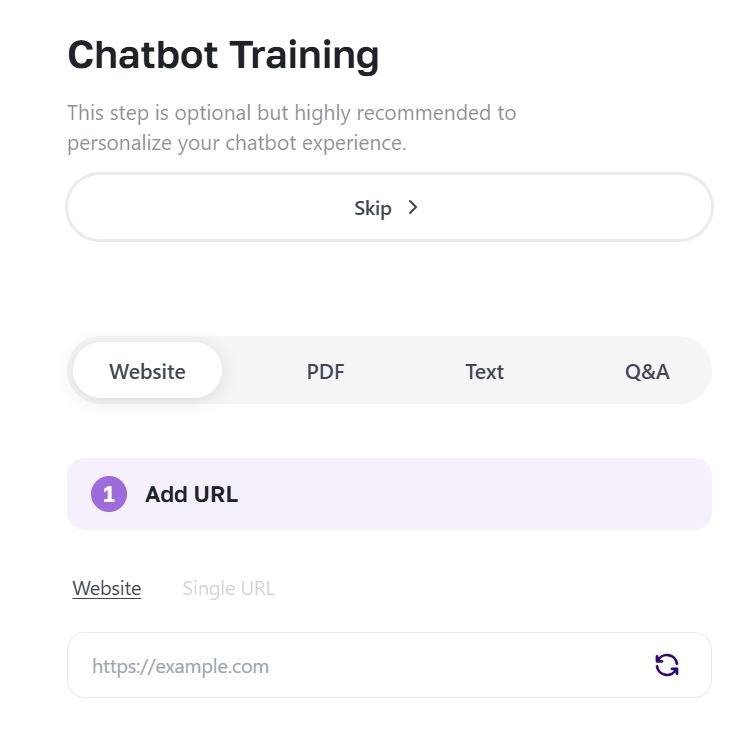
Training is optional but it is what makes the answers yours. Point it at your website, upload a PDF, paste text, or write question-and-answer pairs for the things you are asked most. Start with the pages you would send a customer to anyway.
Website, PDF, text and Q&A are all accepted as training sources. Check it before it goes live
Use the preview to ask the questions your customers actually ask, including one the assistant should refuse. Adjust the instructions or add training material until the answers read the way you would answer yourself.
Test the awkward questions, not just the easy ones. Embed it on your website
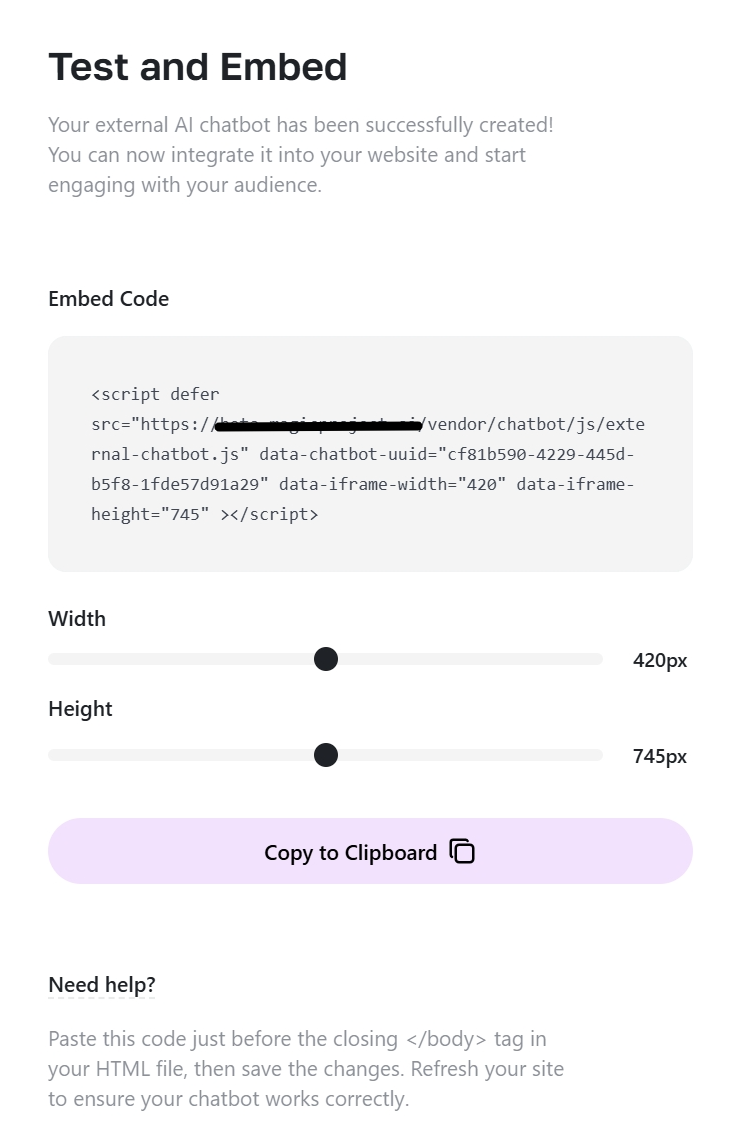
The final step gives you a small snippet and a width and height for the window. Copy the snippet and paste it just before the closing </body> tag of your site, then save and refresh the page to see the assistant appear.
One snippet, pasted before the closing body tag.
Let visitors talk to the assistant
Switch on the voice call agent
In the chatbot configuration, turn on Enable Voice Call Agent. Visitors can then hold a spoken conversation with the assistant in the same window instead of typing.
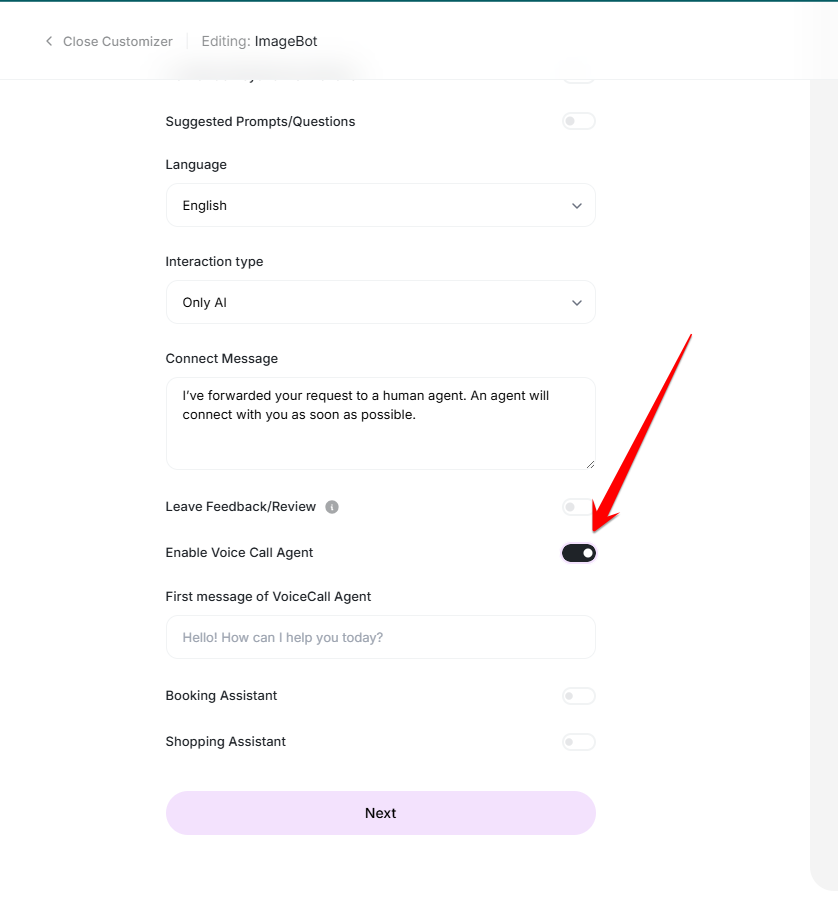
The voice switch sits under the feedback option. Write the first spoken line
Fill in the first message of the voice agent. This is the greeting the assistant speaks when a visitor starts a call, so keep it short, warm and in the voice of your business.
Before you publish
- Read the instructions back as if you were a customer: anything vague will show up as a vague answer.
- Give the assistant a clear route to a human for refunds, complaints and anything with money attached.
- Do not train it on internal documents, price lists or customer data you would not publish on the page.
- Check the conversations in the first week and add the questions you did not anticipate.
Ready to try it?
Try External Chatbot Builder in AmmarAI